
| 일 | 월 | 화 | 수 | 목 | 금 | 토 |
|---|---|---|---|---|---|---|
| 1 | 2 | 3 | 4 | 5 | ||
| 6 | 7 | 8 | 9 | 10 | 11 | 12 |
| 13 | 14 | 15 | 16 | 17 | 18 | 19 |
| 20 | 21 | 22 | 23 | 24 | 25 | 26 |
| 27 | 28 | 29 | 30 |
- 리액트
- pull
- merge
- 리사이클러뷰
- redux
- 웹
- list.map
- equalityFn
- typescript
- rebase
- 리덕스
- hot Reloading
- Git
- await
- php문법
- react
- 자동반영
- list
- 가상회선교환
- Kotlin
- javascript
- 리액트를 다루는 기술
- createPortal
- CSS
- 비동기처리
- useCallback
- 컬러구성
- async
- useState
- 공부
- Today
- Total
공부블로그
14장. 외부 API를 연동하여 뉴스 뷰어 만들기 본문
14. 1 ) 비동기 작업의 이해
비동기적으로 작업을 처리하면 웹 애플리케이션이 멈추지 않기 때문에 동시에 여러 가지 요청을 처리할 수도 있고, 기다리는 과정에서 다른 함수도 호출할 수 있다.
네트워크 송수신 과정에서 시간이 걸리는 API호출, setTimeout 함수를 사용한 특정 작업을 예약할 때 비동기적으로 처리한다.
예를 들어 다음 코드는 3초후에 printMe함수를 호출한다.
function printMe() {
	console.log('Hello World');
}
setTimeout(printMe, 3000);
console.log('대기 중....');
printMe 함수 자체를 setTimeout 함수의 인자로 전달해 주는데, 이런 함수를 콜백함수라고 한다.
Promise는 콜백 지옥 같은 코드가 형성되지 않도록 해주는 기능으로, 함수를 여러번 감싸는 게 아니라 .then을 사용하여 그다음 작업을 설정한다.
async / await 는 Promise를 더욱 쉽게 사용하게 해주는 문법으로, 이렇게 하면 Promise가 끝날 때까지 기다리고, 결과 값을 특정 변수에 담을 수 있다.
function increase(number) {
	const promise = new Promise((resolve, reject)=> {
    //resolve는 성공, reject는 실패
    setTimeout(()=>	{
    	const result = number + 10;
        if (result > 50){ //50보다 높으면 에러 발생시키기
        	const e = new Error('NumberTooBig');
            	return reject(e);
    			}
    		resolve(result); // number값에 +10 후 성공 처리
    	}, 1000)
	});
 	return promise;

    async function runTask() {
    	try { //try/catch를 사용하여 에러를 처리
        	let result = await increase(0);
            console.log(result);
            result = await increase(result);
            console.log(result);
            result = await increase(result);
            console.log(result);
            result = await increase(result);
            console.log(result);
            result = await increase(result);
            console.log(result);
        } catch (e) {
      		console.log(e);
	}
}
14. 2 ) axios로 API 호출해서 데이터 받아오기
axios는 현재 가장 많이 사용되고 있는 자바스크립트 HTTP 클라이언트이다. 이 라이브러리의 특징은 HTTP 요청을 Promise기반으로 처리한다는 것이다.
App. js ( 불러오기 버튼을 누르면 JSONPlaceholder( https://jsonplaceholder.typicode.com )에서 제공하는 가짜 API를 호출하고 이에 대한 응답을 컴포넌트 상태에 넣어서 보여준다. )
import React, { useState } from 'react';
import axios from 'axios';

const App = () => {
  const [data, setData] = useState(null);
  const onClick = () => {
    axios
      .get('https://jsonplaceholder.typicode.com/todos/1')
      //axios.get함수는 파라미터로 전달된 주소에 GET요청을 해주고,
      //이에 대한 결과는 .then을 통해 비동기적으로 확인
      .then((response) => {
        setData(response.data);
      });
  };
  return (
    <div>
      <div>
        <button onClick={onClick}>불러오기</button>
      </div>
      {data && (
        <textarea
          rows={7}
          value={JSON.stringify(data, null, 2)}
          readOnly={true}
        />
      )}
    </div>
  );
};

export default App;
위 코드에 async를 적용 ( async ( ) => { } )
const onClick = async () => {
    try {
      const response = await axios.get(
        'https://jsonplaceholder.typicode.com/todos/1',
      );
      setData(response.data);
    } catch (e) {
      console.log(e);
    }
  };
14. 3 ) newsapi API키 발급받기
News API – Free JSON API for Live News and Blog Articles
Search worldwide news articles and headlines from across the web in real-time with our free News API.
newsapi.org
에 가입하면 발급이 가능하다.
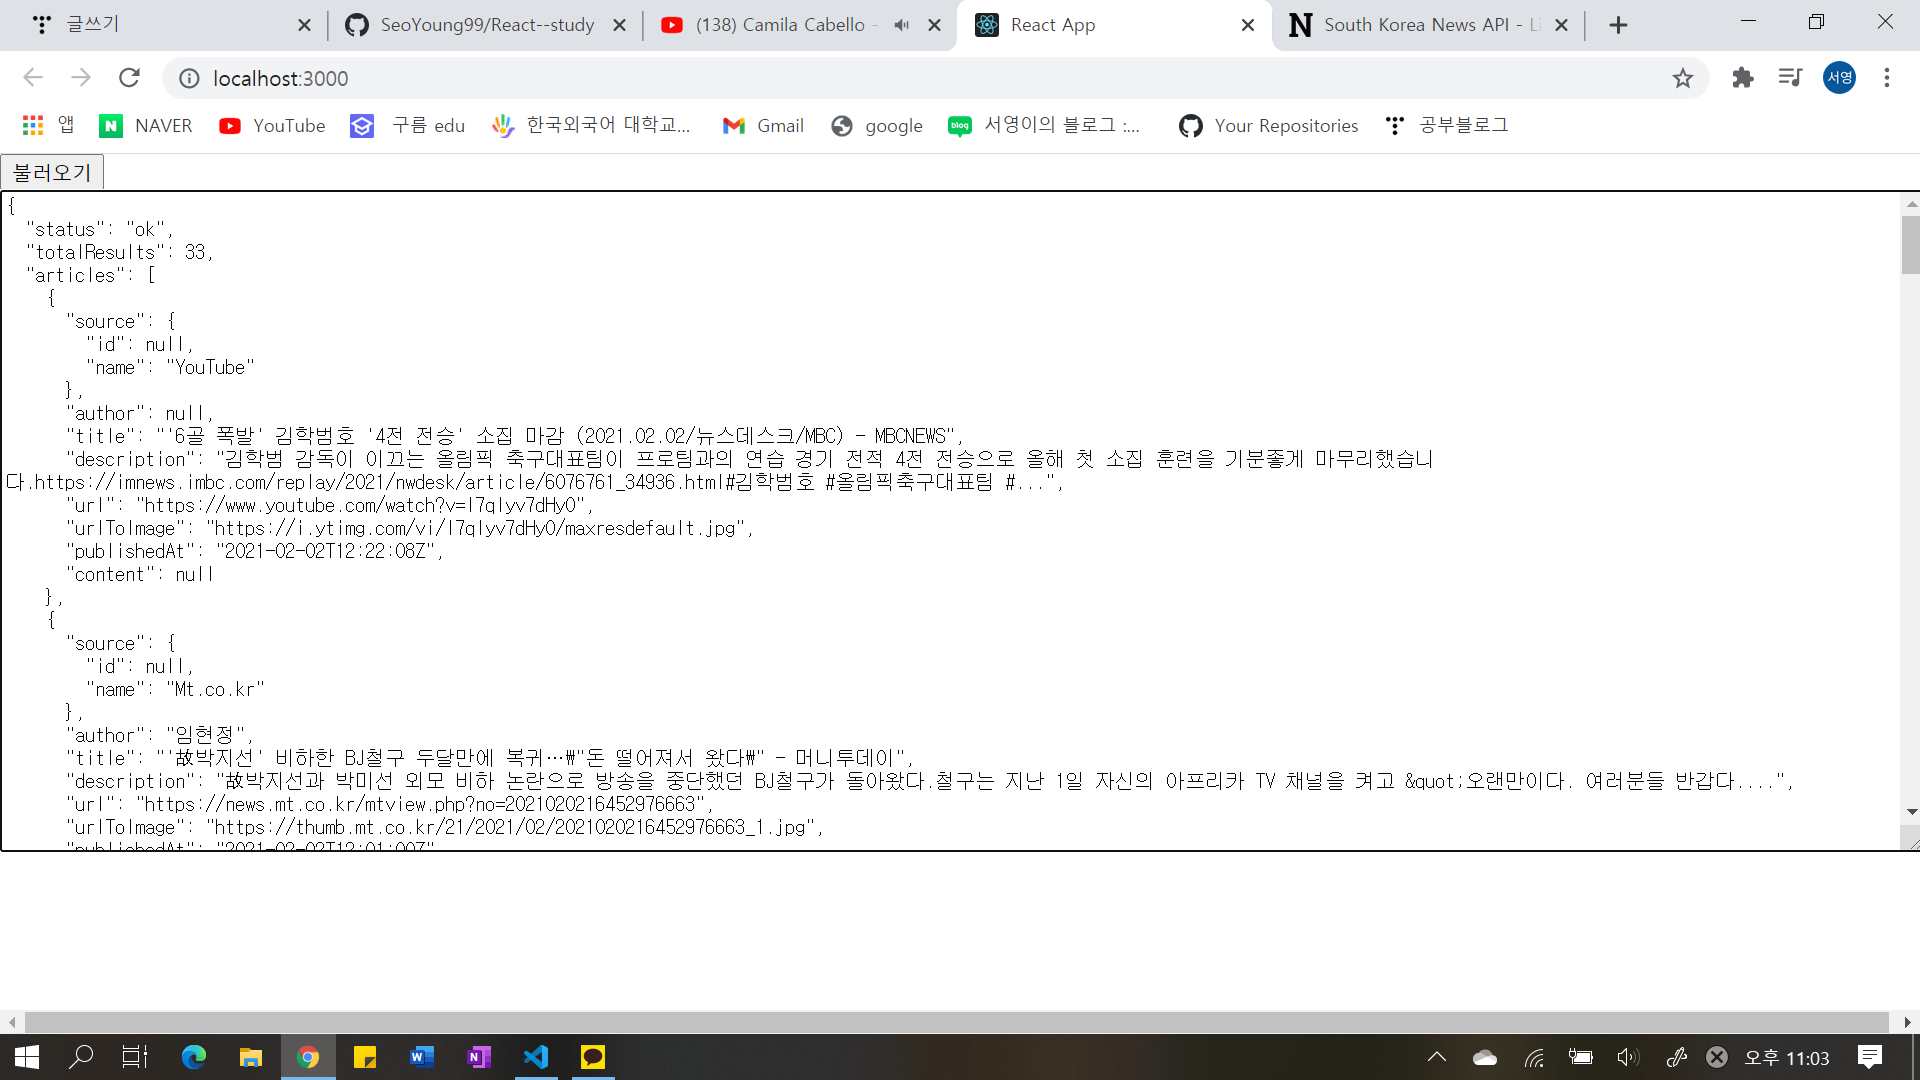
위의 코드의 apiKey값에 위에서 발급받은 뉴스를 불러오는 API로 대체해보자.
const response = await axios.get(

        'http://newsapi.org/v2/top-headlines?country=kr&apiKey=66cd214b91f0456ba0db9077554010dd',

      );
아래와 같은 화면이 나온다.
14. 4 ) 뉴스 뷰어 만들기
styled-component를 사용하여 화면을 예쁘게 보여보자. ( $ yarn add styled-components )
src 안에 components 디렉터리를 만들고 각 뉴스정보를 보여주는 NewsItem. js 와 API를 요청하고 뉴스 데이터가 들어있는 배열을 컴포넌트 배열로 변환하여 렌더링해주는 NewsList. js 를 만들어준다.
14. 4. 1 ) NewsItem 만들기
뉴스데이터에 필요한 필드 : title ( 제목 ), description ( 내용 ), url ( 링크 ), urlTolmage ( 뉴스 이미지 )
NewsItem 컴포넌트는 article이라는 객체를 props으로 통째로 받아와서 사용한다.
import React from 'react';
import styled from 'styled-components';

const NewsItemBlock = styled.div`
  //스타일 정의
  display: flex;
  .thumbnail {
    //클래스명
    margin-right: 1rem;
    img {
      display: block;
      width: 160px;
      height: 100px;
      object-fit: cover;
    }
  }
  .contents {
    h2 {
      margin: 0;
      a {
        color: black;
      }
    }
    p {
      margin: 0;
      line-height: 1.5;
      margin-top: 0.5rem;
      white-space: normal;
    }
  }
  & + & {
    //사이 스타일링
    margin-top: 3rem;
  }
`;

const NewsItem = ({ article }) => {
  //props로 받아온 article
  const { title, description, url, urlToImage } = article; //객체 선언
  return (
    <NewsItemBlock //전체를 위에서 정의한 스타일로 감싸줌
    >
      {urlToImage && ( //가져온 객체를 스타일링과 함께 조건부로 사용
        <div className="thumbnail">
          <a href={url} target="_blank" rel="noopener noreferrer">
            <img src={urlToImage} alt="thumbnail" />
          </a>
        </div>
      )}
      <div className="contents">
        <h2>
          <a href={url} target="_blank" rel="noopener noreferrer">
            {title}
          </a>
        </h2>
        <p>{description}</p>
      </div>
    </NewsItemBlock>
  );
};

export default NewsItem;
14. 4. 2 ) NewsList 만들기
이 컴포넌트에서 API요청
import React from 'react';
import styled from 'styled-components';
import NewsItem from './NewsItem';

const NewsLsitBlock = styled.div`
  box-sizing: border-box;
  padding-bottom: 3rem;
  width: 768px;
  margin: 0 auto;
  margin-top: 2rem;
  @media screen and (max-width: 768px) {
    width: 100%;
    padding-left: 1rem;
    padding-right: 1rem;
  }
`;
const sampleArticle = {
  //예시로 만든 객체
  title: '제목',
  description: '내용',
  url: 'https://google.com',
  urlToImage: 'https://via.placeholder.com/160',
};

const NewsList = () => {
  return (
    <NewsLsitBlock>
      <NewsItem article={sampleArticle} />
      <NewsItem article={sampleArticle} />
      <NewsItem article={sampleArticle} />
      <NewsItem article={sampleArticle} />
      <NewsItem article={sampleArticle} />
      <NewsItem article={sampleArticle} />
      <NewsItem article={sampleArticle} />
    </NewsLsitBlock>
  );
};
export default NewsList;
마지막으로 App. js에서 return <NewsLsit /> 를 해주면

14. 5 ) 데이터 연동하기
NewsList 컴포넌트에서 API를 호출해보자. 컴포넌트가 화면에 보이는 시점에서 API를 요청한다.
useEffect를 사용하여 컴포넌트가 처음 렌더링되는 시점에 API를 요청. 이때 useEffect에서 반환해야 하는 값은 뒷정리 함수이므로 async를 붙이면 안된다.
따라서 async/await를 사용하고 싶다면 함수내부에 async 키워드가 붙은 또 다른 함수를 만들어서 사용해야 한다.
NewsList. js
import React, { useState, useEffect } from 'react';
import styled from 'styled-components';
import NewsItem from './NewsItem';
import axios from 'axios';

const NewsLsitBlock = styled.div`
  box-sizing: border-box;
  padding-bottom: 3rem;
  width: 768px;
  margin: 0 auto;
  margin-top: 2rem;
  @media screen and (max-width: 768px) {
    width: 100%;
    padding-left: 1rem;
    padding-right: 1rem;
  }
`;

const NewsList = () => {
  const [articles, setArticles] = useState(null);
  // articles라는 상태 선언
  const [loading, setLoading] = useState(false);
  // loadinf이라는 상태 선언 (API요청이 대기중인지 판별)

  useEffect(() => {
    //async를 사용하는 함수 따로 선언
    const fetchData = async () => {
      setLoading(true);
      try {
        const response = await axios.get(
          //데이터를 불러와서
          'http://newsapi.org/v2/top-headlines?country=kr&apiKey=66cd214b91f0456ba0db9077554010dd',
        );
        setArticles(response.data.articles); //articles에 업데이트
      } catch (e) {
        console.log(e);
      }
      setLoading(false);
    };
    fetchData();
  }, []);

  //대기 중일 때
  if (loading) {
    return <NewsLsitBlock> 대기 중...</NewsLsitBlock>;
  }
  //아직 articles값이 설정되지 않았을 때
  if (!articles) {
    //해당값이 현재 null인지 꼭! 검사해야함
    return null;
  }
  //articles값이 유효할 때
  return (
    <NewsLsitBlock>
      {articles.map((article) => (
        <NewsItem key={articles.url} article={article} />
      ))}
    </NewsLsitBlock>
  );
};
export default NewsList;

14. 6 ) 카테고리 기능 구현하기
카테고리는 총 여섯개이다. ( business, science, entertainment, sports, health, technology )
한글 카테고리를 클릭했을 때 영어로 된 카테고리 값을 사용하도록 구현한다.
14. 6. 1 ) 카테고리 선택 UI 만들기
components 디렉터리에 Categories. js 컴포넌트 파일 생성
import React from 'react';
import styled, { css } from 'styled-components';

const categories = [
  //categories라는 배열 안에 name과 text값이 들어가 있는 객체들을 넣어
  //한글로 된 카테고리와 실제 카테고리 값을 연결시켜 줌
  {
    name: 'all', //실제 카테고리 값
    text: '전체보기', //렌더링할 때 사용할 한글 카테고리
  },
  {
    name: 'business',
    text: '비즈니스',
  },
  {
    name: 'entertainment',
    text: '엔터테인먼트',
  },
  {
    name: 'health',
    text: '건강',
  },
  {
    name: 'science',
    text: '과학',
  },
  {
    name: 'sports',
    text: '스포츠',
  },
  {
    name: 'technology',
    text: '기술',
  },
];
const CategoriesBlock = styled.div`
  display: flex;
  padding: 1rem;
  width: 768px;
  margin: 0 auto;
  @media screen and (max-width: 768px) {
    width: 100%;
    overflow-x: auto;
  }
`;

const Category = styled.div`
  font-size: 1.125rem;
  cursor: pointer;
  white-space: pre;
  text-decoration: none;
  color: inherit;
  padding-bottom: 0.25rem;
  &:hover {
    color: #495057;
  }

  ${(props) =>
    props.active &&
    css`
      font-weight: 600;
      border-bottom: 2px solid #22b8cf;
      color: #22b8cf;
      &:hover {
        color: #3bc9db;
      }
    `}
  & + & {
    margin-left: 1rem;
  }
`;
const Categories = ({ onSelect, category }) => {
  //받아온 props
  return (
    <CategoriesBlock>
      {categories.map((c) => (
        <Category
          key={c.name}
          active={category === c.name}
          onClick={() => onSelect(c.name)}
        >
          {c.text}
        </Category>
      ))}
    </CategoriesBlock>
  );
};

export default Categories;
App에서 category 상태를 useState로 관리, category값을 업데이트하는 onSelect함수 만들기
→ category와 onSelect함수를 Categories컴포넌트의 props로 전달, category는 NewList 컴포넌트의 props로도 전달
import React, { useState, useCallback } from 'react';
import NewsList from './components/NewsList';
import Categories from './components/Categories';
const App = () => {
  const [category, setCategory] = useState('all');
  const onSelect = useCallback((category) => setCategory(category), []);
  return (
    <>
      <Categories category={category} onSelect={onSelect} />
      <NewsList category={category} />
    </>
  );
};

export default App;
전달받은 props ( category, onSelect함수 )를 각 Category컴포넌트의 onClick으로 설정, 현재 선택된 카테고리 값에 따라 다른 스타일을 적용
14. 6. 2 ) API를 호출할 때 카테고리 지정하기
NewsList컴포넌트에서 현재 props로 받아온 category에 따라 카테고리를 지정하여 API를 호출하도록 구현한다.
import React, { useState, useEffect } from 'react';
import styled from 'styled-components';
import NewsItem from './NewsItem';
import axios from 'axios';

const NewsLsitBlock = styled.div`
  box-sizing: border-box;
  padding-bottom: 3rem;
  width: 768px;
  margin: 0 auto;
  margin-top: 2rem;
  @media screen and (max-width: 768px) {
    width: 100%;
    padding-left: 1rem;
    padding-right: 1rem;
  }
`;

const NewsList = ({ category }) => {
  const [articles, setArticles] = useState(null);
  // articles라는 상태 선언
  const [loading, setLoading] = useState(false);
  // loadinf이라는 상태 선언 (API요청이 대기중인지 판별)

  useEffect(() => {
    //async를 사용하는 함수 따로 선언
    const fetchData = async () => {
      setLoading(true);
      try {
        const query = category === 'all' ? '' : `&category=${category}`;
        //현재 category값이 무엇인지에 따라 요청할 주소가 동적으로 바뀜
        //category 값이 all이면query 값을 공백으로 설정하고,
        //all이 아니면 &category=카테고리 형태의 문자열을 만들도록 함
        const response = await axios.get(
          //데이터를 불러와서
          `http://newsapi.org/v2/top-headlines?country=kr${query}&apiKey=66cd214b91f0456ba0db9077554010dd`,
          //그리고 그 문자열을 주소에 포함
        );
        setArticles(response.data.articles); //articles에 업데이트
      } catch (e) {
        console.log(e);
      }
      setLoading(false);
    };
    fetchData();
  }, [category]); //category값이 바뀔 때마다 뉴스를 새로 불러와야 하므로 []에 category 넣어줌

  //대기 중일 때
  if (loading) {
    return <NewsLsitBlock> 대기 중...</NewsLsitBlock>;
  }
  //아직 articles값이 설정되지 않았을 때
  if (!articles) {
    //해당값이 현재 null인지 꼭! 검사해야함
    return null;
  }
  //articles값이 유효할 때
  return (
    <NewsLsitBlock>
      {articles.map((article) => (
        <NewsItem key={articles.url} article={article} />
      ))}
    </NewsLsitBlock>
  );
};
export default NewsList;
14. 7 ) 리액트 라우터 적용하기
앞에서 useState로 관리했던 카테고리 값을 URL파라미터를 사용해 관리해보자.
index. js
import React from 'react';
import ReactDOM from 'react-dom';
import './index.css';
import App from './App';
//import * as serviceWorker from './serviceWorker';
import { BrowserRouter } from 'react-router-dom';

ReactDOM.render(
  <BrowserRouter>
    <App />
  </BrowserRouter>,
  document.getElementById('root'),
);
NewsPage. js
import React from 'react';
import Categories from '../components/Categories';
import NewsList from '../components/NewsList';

const NewsPage = ({ match }) => {
  //카테고리가 선택되지 않았으면 기본값 all사용
  const category = match.params.category || 'all';

  return (
    <>
      <Categories />
      <NewsList category={category} />
    </>
  );
};
export default NewsPage;
App. js
import React from 'react';
import { Route } from 'react-router-dom';
import NewsPage from './pages/NewsPage';

const App = () => {
  return <Route path="/:category?" component={NewsPage} />;
  //category값이 선택적 즉, 있을 수도 있고 없을 수도 있다.
};

export default App;
Categories. js 에서 카테고리를 선택하고 선택된 카테고리에 다른 스타일을 주는 기능에 NavLink 사용하기
import React from 'react';
import styled from 'styled-components';
import { NavLink } from 'react-router-dom';

const categories = [
  ...
];
const CategoriesBlock = styled.div`
  ...
`;

const Category = styled(NavLink)`
  font-size: 1.125rem;
  cursor: pointer;
  white-space: pre;
  text-decoration: none;
  color: inherit;
  padding-bottom: 0.25rem;
  &:hover {
    color: #495057;
  }

  &.active {
    font-weight: 600;
    border-bottom: 2px solid #22b8cf;
    color: #22b8cf;
    &:hover {
      color: #3bc9db;
    }
  }

  & + & {
    margin-left: 1rem;
  }
`;
const Categories = ({ onSelect, category }) => {
  //받아온 props
  return (
    <CategoriesBlock>
      {categories.map((c) => (
        <Category
          key={c.name}
          activeClassName="active"
          exact={c.name === 'all'}
          to={c.name === 'all' ? '/' : `/${c.name}`}
          //to 값이 '/'를 가리키고 있을 때는 exact값을 true로
          //이 값을 설정하지 않으면 다른 카테고리가 선택되었을 때도 전체보기 링크에 active스타일 적용
        >
          {c.text}
        </Category>
      ))}
    </CategoriesBlock>
  );
};

export default Categories;
14. 8 ) usePromise 커스텀 Hook 만들기
src/ lib/ usePromise. js
import { useState, useEffect } from 'react';

export default function usePromise(promiseCreator, deps) {
  // 로딩중 / 완료 / 실패에 대한 상태 관리
  const [loading, setLoading] = useState(false);
  const [resolved, setResolved] = useState(null);
  const [error, setError] = useState(null);

  useEffect(() => {
    const process = async () => {
      setLoading(true);
      try {
        const resolved = await promiseCreator();
        setResolved(resolved);
      } catch (e) {
        setError(e);
      }
      setLoading(false);
    };
    process();
    // eslint-disable-next-line react-hooks/exhaustive-deps
  }, deps);

  return [loading, resolved, error];
}
프로젝트의 다양한 곳에서 사용될 수 있는 유틸 함수들은 보통 이렇게 src 디렉터리에 lib 디렉터리를 만든 후에 저장한다.
위의 usePromise Hook는 Promise의 대기 중, 완료 결과, 실패 결과에 대한 상태를 관리하고 usePromise의 의존 배열 deps를 파라미터로 받아온다. 파라미터로 받아온 deps 배열은 usePromise내부에서 사용한 useEffect의 의존 배열로 설정된다.
NewsList. js에서 usePromise를 사용해보자.
...
import usePromise from '../lib/usePromise';

const NewsListBlock = styled.div`
  ...
`;

const NewsList = ({ category }) => {
  const [loading, response, error] = usePromise(() => {
    const query = category === 'all' ? '' : `&category=${category}`;
    return axios.get(
      `https://newsapi.org/v2/top-headlines?country=kr${query}&apiKey=0a8c4202385d4ec1bb93b7e277b3c51f`,
    );
  }, [category]);

  // 대기중일 때
  if (loading) {
    return <NewsListBlock>대기중...</NewsListBlock>;
  }
  // 아직 response 값이 설정되지 않았을 때
  if (!response) {
    return null;
  }

  // 에러가 발생했을 때
  if (error) {
    return <NewsListBlock>에러 발생!</NewsListBlock>;
  }

  // response 값이 유효할 때
  const { articles } = response.data;
  return (
    <NewsListBlock>
      {articles.map((article) => (
        <NewsItem key={article.url} article={article} />
      ))}
    </NewsListBlock>
  );
};

export default NewsList;
'리액트 > 리액트를 다루는 기술' 카테고리의 다른 글
| 18장. 리덕스 미들웨어를 통한 비동기 작업 관리 (0) | 2021.02.11 |
|---|---|
| 17장. 리덕스를 사용하여 리액트 애플리케이션 상태 관리하기 (0) | 2021.02.09 |
| 13장. 리액트 라우터로 SPA 개발하기 (0) | 2021.02.02 |
| 11장. 컴포넌트 성능 최적화 (0) | 2021.01.23 |
| 10장. 일정관리 웹 애플리케이션 만들기 (0) | 2021.01.21 |


